Time needed: 15 minutes
In this article you will learn how to sketch step by step easy.
- Let’s Get Started
To learn how to sketch step-by-step you just need a pencil and a piece of paper and a lot of practice.
in order to practice don’t pay attention to details or any specific shading, just pay attention to its form and angles in which the object is.
Try to make many small sketches and don’t spend more than 5 minutes on any sketches when practicing. Try to create as many sketches as possible of one particular object from different angles or lots of different objects.
Check out this art material if you are serious about creating drawings:- ‘Art Supplies’ - Draw Basic Structure

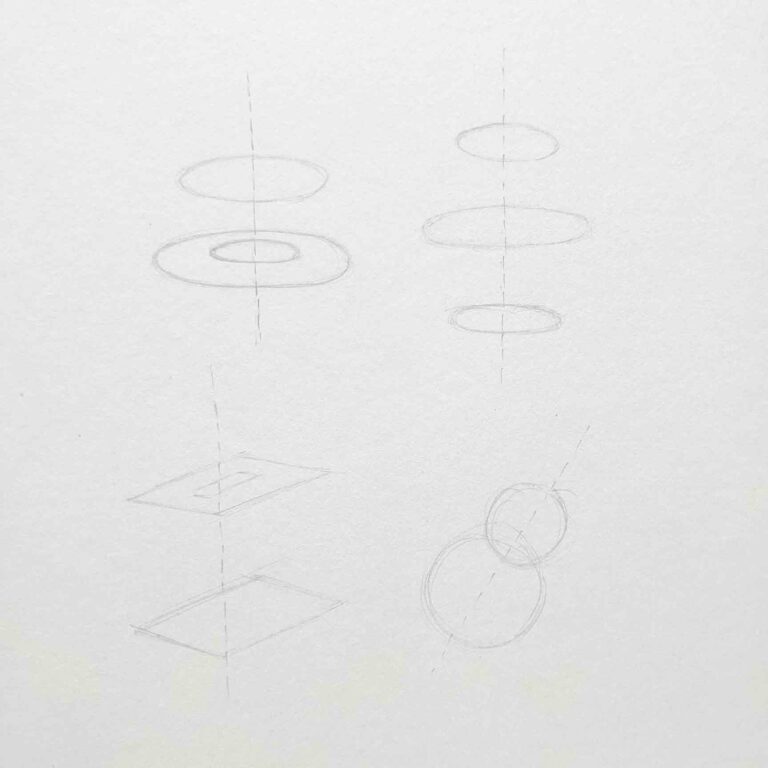
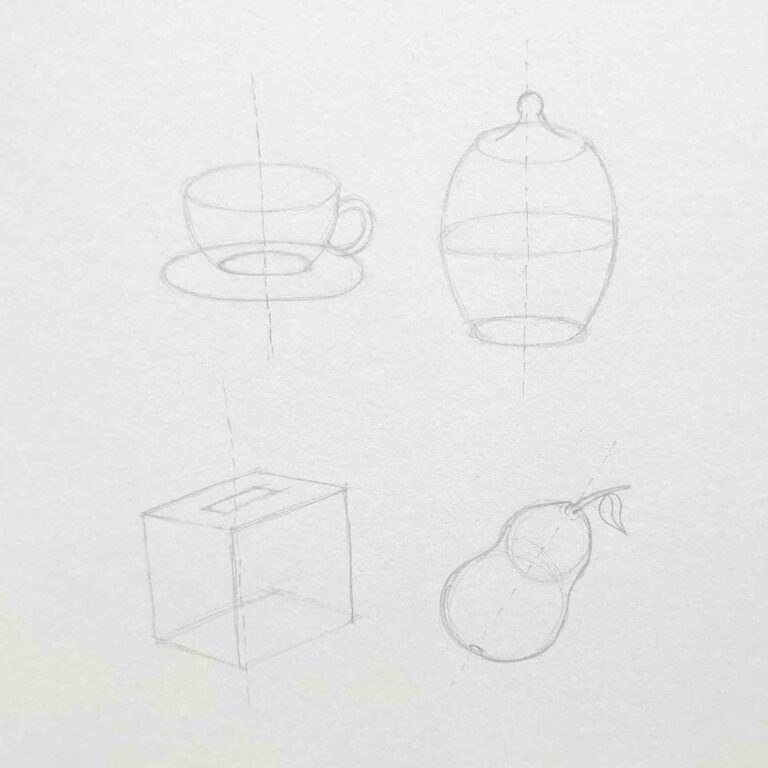
To start any sketch first draw a center-line as a center of gravity to define the proportion and the angle of that object.
Then determine that the shape is round or rectangle or square then draw its basic shape.
When people don’t follow these basic steps then after they complete their drawing the angles looks off.
Although these basic steps look boring I also do these mistakes often by directly jumping on to the actual shape, but basic steps are a must. - Define shape
So after you have drawn a basic structure of the object just connect the lines and define the shape of that object.
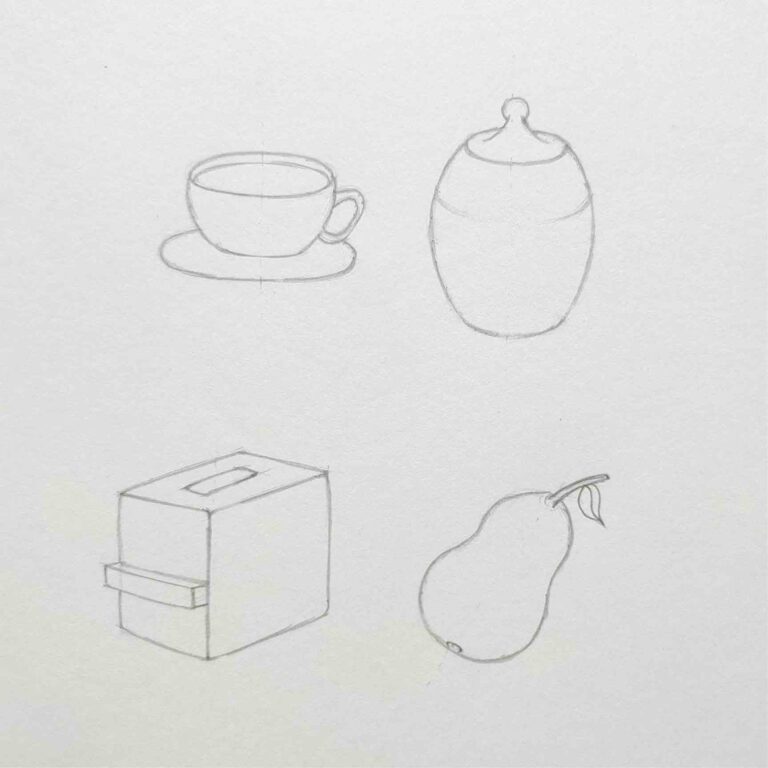
You can rub off the extra lines which are for your guidance and now as we have defined the shape we don’t want it to show the lines which are supposed to be from the back side. - Outline or Contour drawing
As you can see we got rid of all the extra lines and drawn a dark line for the outline.
Only draw outlines dark if you are practising sketching, when you are drawing a still life draw the outline as light as possible.
Try to give some details in the outline process so it can act as sections for shading. - Shading Process
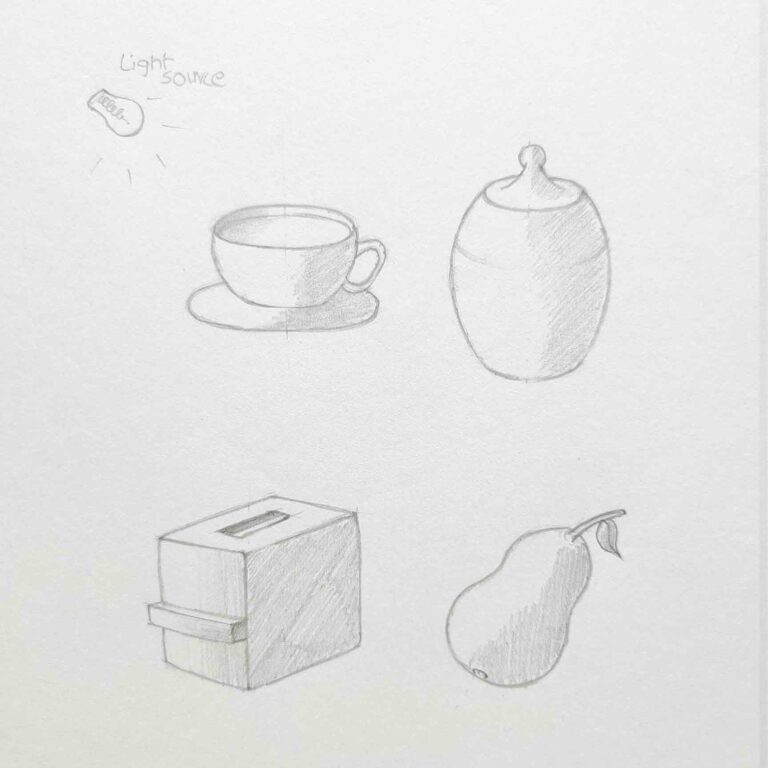
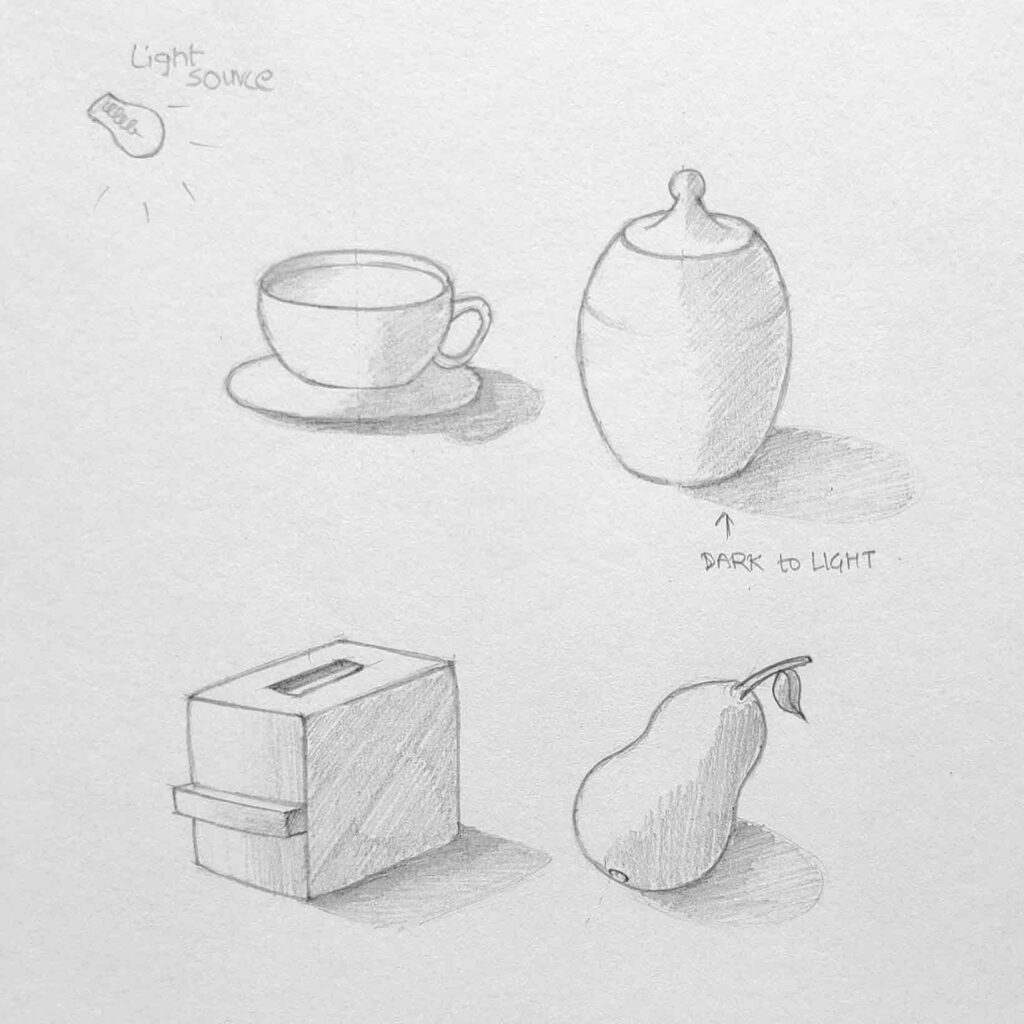
Now before starting the shading process, let’s first decide on a light source direction.
The light source will decide where the light, medium, and dark shading will go and where the shadows will go.
After deciding the light source we can start adding the shades accordingly,
you can also make a light bulb in the corner just like me as a reminder if you are just starting in the drawing world.
While practicing sketches just a one tone shading will do just like mine, you don’t have to give a detailed shading, or if you are in the mood then sure you can go for it 🙂 - Adding Shadows
To draw a cast shadow is so simple yet so important just compare the above image with this one, just by putting a simple cast shadow makes a lot of difference and gives any object a 3rd-dimensional look.
You just have to draw the cast shadow in the opposite direction of the light source, Draw it in a light to dark manner to give it a more natural feel.
Keep on practicing and your sketching will improve in no time.
If you learned anything from this tutorial don’t forget to comment down below 🙂