You can make your drawing easy if you follow all the steps ;
I want you to start with me and follow along so that you can learn more quickly and efficiently,
Just grab the things I mentioned above and let’s get started.
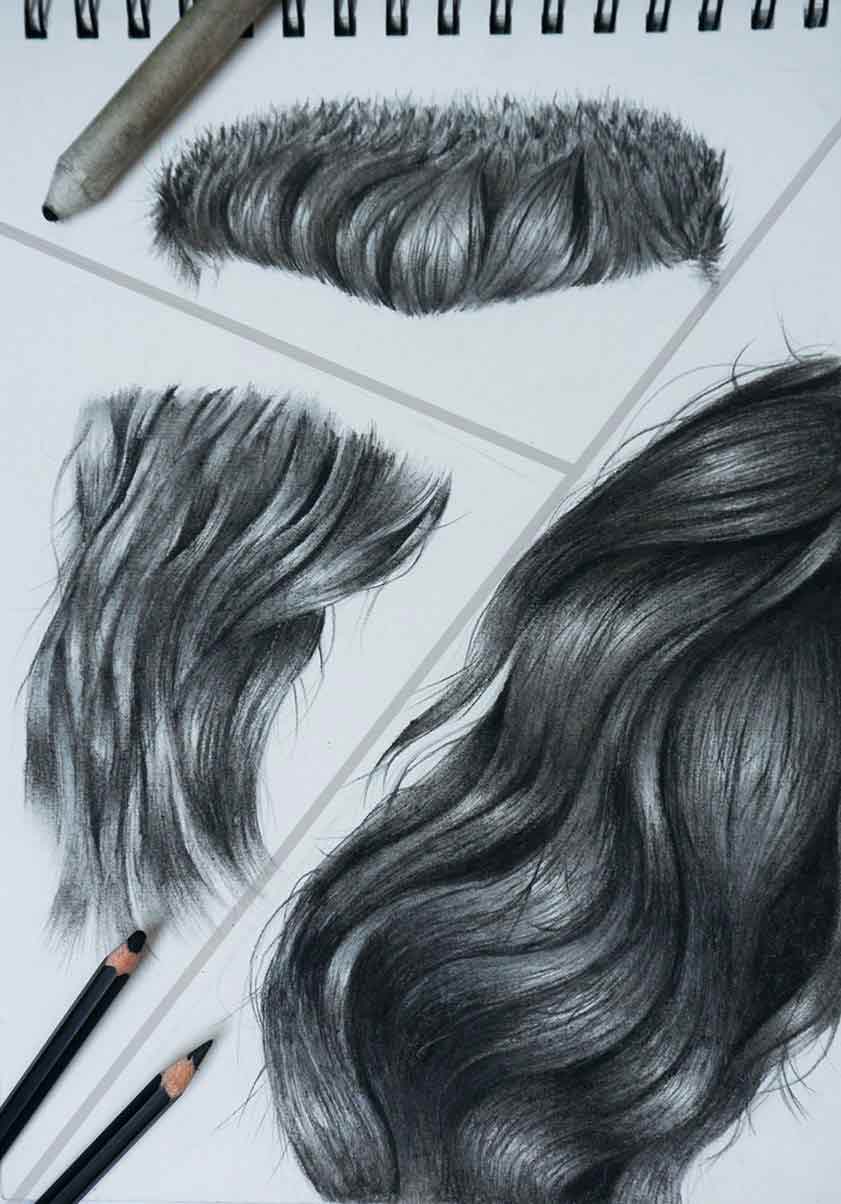
As you can see in the above image I have shown three types of ways you can draw hairs so you can get the idea of how to draw hairs of male and female characters and what are the differences.
1. DRAWING BASIC STRUCTURE


so I have started drawings strong lines as per the rough lines guide
Now you can’t draw every single strand of hair that will take ages to draw the full hair,
so we have to group them in parts, we have to look for all the big parts of hairs which are flowing together and group them apart and we have to draw the groups considering their individual drawings.
In drawing hairs all beginners make the same mistake, as they don’t consider hairs as an important part of any portrait or face drawing .and they rush it making random lines and hence making the whole portrait drawing messed up.
So hair is an important part of the drawing and it will take lots of patience and time because in the start you will feel bored with hair and there will become an urge to rush it out and complete it fast.
you can make smaller groups in short hairs.
2. OUTLINE OR CONTOUR DRAWING

These outlines will guide us to shade, just take your time and pick a group of strands to start shading, if you don’t know how to shade using dark, medium, and light tones then you can check out my other articles which are specifically for it.
just follow your reference image or just follow me if you are using my image as a reference.
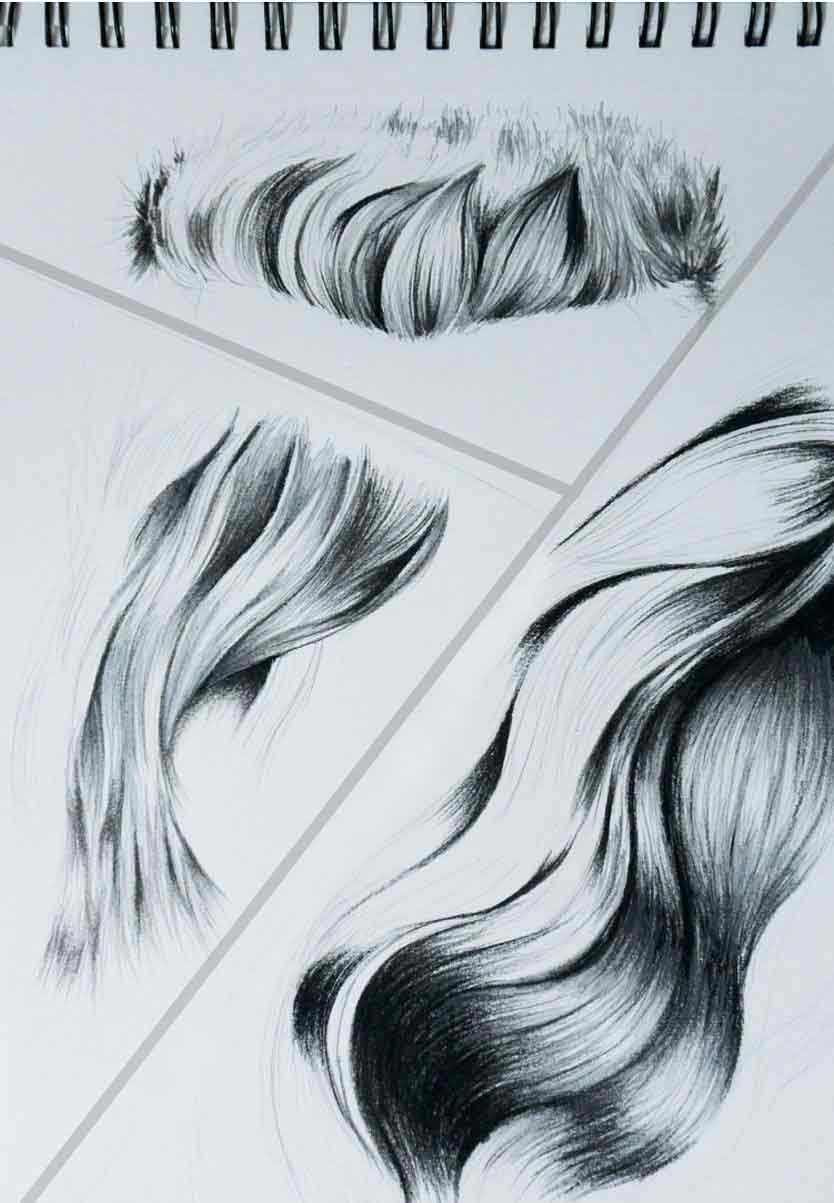
3. ADDING CHARCOAL

This is where I have started using a charcoal pencil, you can use a softer one for the darkest shade.
In hairs you have to create good contrast to give it the shiny feel, I have started by shading the darkest part in the hairs first and I have used charcoal pencils because the graphite pencils cant achieve this much dark tone, so I love to include charcoal pencils in most of my work.
4. ADDING UP LAYERS
For all the groups you have made of the hairs, you have to keep in mind that each and every group flows in a particular direction, you have to follow that direction otherwise it will look like a mess.
You can see how I have kept a particular flow in groups, you have to go dark to light and keep minimal lines in the highlighted area.
Don’t worry about the rough-looking lines because anyways we will be using paper stumps to smooth out the shade.
For the short hairs, you can see I have made little groups and gave them individual shade from dark to light, for the backside hairs you can throw some random lines flowing in a particular direction.
6.SHADING

As you can see I have shaded all the groups of strands in their particular flow,
If you have to separate a group from each other then you can use some black shading beneath a group to make it look higher than the other group, just like you see the group on the top of the long hairs.
Here I have smoothened out all the shaded groups with the help of paper stumps, The female’s hair generally looks very smooth so we have to give that effect using paper stumps.
but it’s not finished yet because still it is looking very uniform and unnatural so we have to add some details to make this uniformity disappear.
7. ADDING SHADING LAYERS

So I have added some random hairlines and half-circles which are crossing all the uniform lines to give it a more natural look.
Now as you can see there are a lot of highlights and usually, we don’t see this much light on our hairs, So gradually increase the shading still you are happy with the number of highlights.
It also depends upon the reference image, if you are drawing a portrait of a model which must be a studio picture then usually the light will be more which is reflecting on the model’s hair.

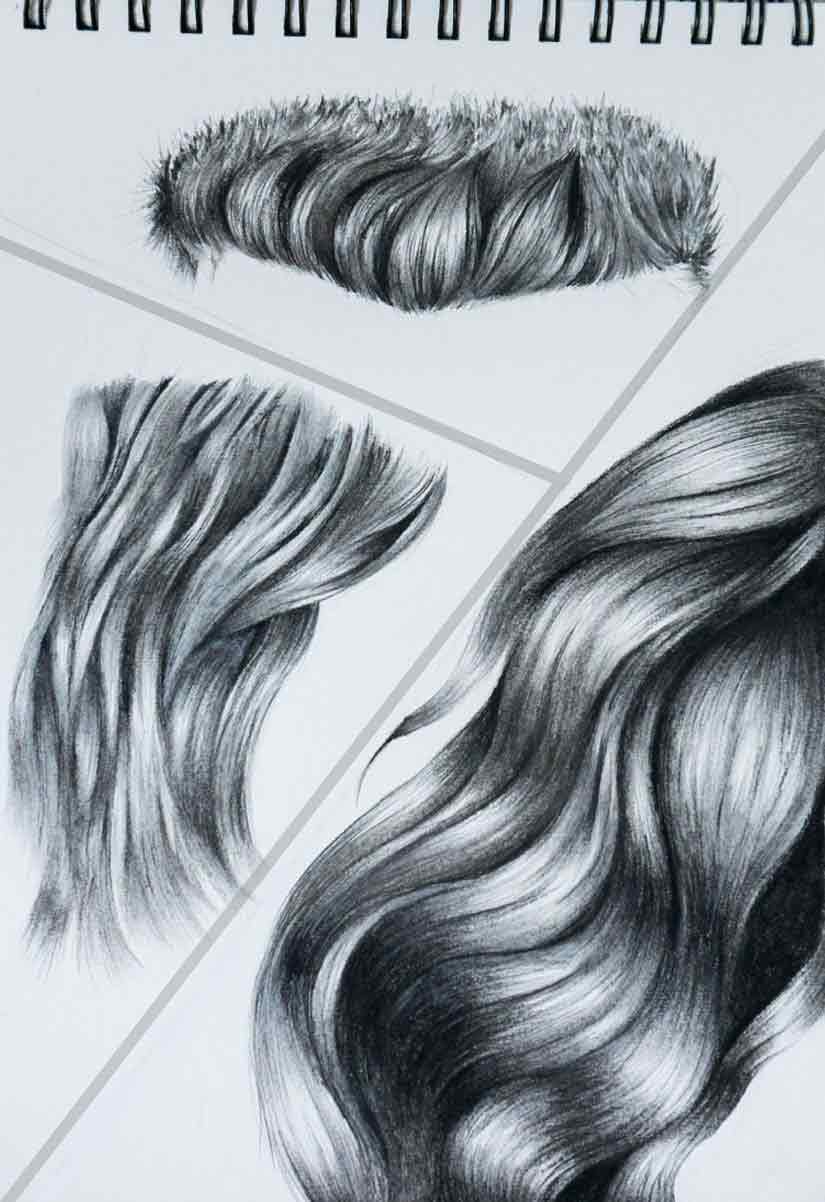
I have added some more shading and left some highlights which I felt appropriate and as per the reference image.
if you increase the intensity of the black in a particular area, then that area will automatically look deep and then if you create a highlight just next to that deep dark area it will just gonna pop up like a 3D effect.
You can also apply these steps to your other drawings to achieve this effect.
This article was to show you the ways to attempt the hairs in the right direction, so you can try these ways to draw any type of hair in the future.
If you can give more time to it you can achieve even better results.
if you applied this method to draw your portrait’s hairs or if you just copied mine for your practice you can show me the picture in the comment section below, I would love to see what you learned.
Wow.This is simply amazing!
Thank you! i am glad you like it and could learn something from it.
AAAAAAAAAAAAAAAAAAAAAAAA THIS IS SO COOL BUT HARD